Disabling the lock screen in Windows 10 Anniversary Update for PTFB Pro

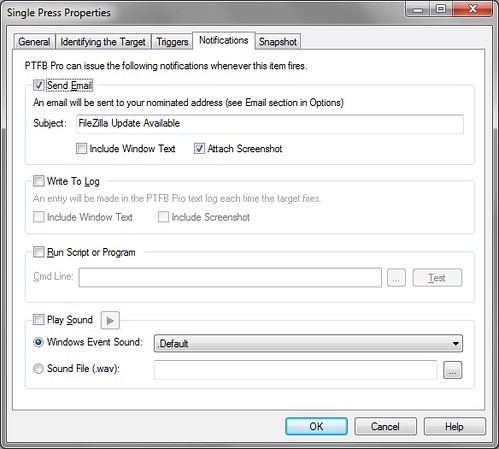
A while back I wrote an article about a registry tweak you could make in Windows 10 that disabled the lock screen; this forced Windows 10 to show only the login screen when the workstation was locked, and allowed PTFB Pro’s special “Unlock computer to press targets” feature to do its thing. BTW, if you weren’t even aware that PTFB had such a thing, check it out. You’ll find the feature in Options -> Configure; it enables PTFB to very briefly unlock a workstation to handle a screen that’s waiting for a response, then automatically relock your computer afterwards. It’s a great way to keep things running smoothly on your machine when you’re not in attendance.

Anyway, it’s now (finally) come to my attention that the Anniversary Update to Windows 10 broke the registry tweak, bringing the lock screen right back and in your face. Happily there is a new registry tweak that once again keeps that pesky (and in my opinion, largely redundant) lock screen from getting in the way; less happily, Windows 10 keeps resetting the tweak behind your back.

A guy called Sergey Tkachenko on the WinAero site wrote an article showing how to get Windows’ built-in Task Scheduler to reapply the registry tweak as often as necessary to keep the lock screen at bay. It’s an elegant solution, and for your convenience I’ll include the guts of the procedure here.

  1. Open up Task Scheduler (just type “Task Sched” into the search box on your taskbar; it should be the top find)
  2. Choose “Create Task…” from the right-hand “Actions” pane. (Note it is “Create Task” you want, rather than “Create Basic Task”)
  3. On the General tab of the resulting Create Task dialog, give your new task a meaningful name, tick the option marked “Run with highest privileges” and choose “Windows 10” from the “Configure for” dropdown list.
  4. Switch to the Triggers tab and two new triggers: “At logon” and “On workstation unlock”. Set them both to fire for “Any user” and take the defaults for everything else.


  5. Switch to the Actions tab, and set “reg.exe” as the program, then paste the following into the “Add Arguments” field (all one line):
    add HKLM\SOFTWARE\Microsoft\Windows\CurrentVersion\Authentication\LogonUI\SessionData /t REG_DWORD /v AllowLockScreen /d 0 /f 


  6. On the Conditions tab, you may wish to turn OFF the two power options that restrict the task to AC power if you’re using a portable device.
  7. Click OK to save your changes, then select your new task and choose “Run”from the actions pane to run it once.

The registry tweak that disables the lock screen (a setting “AllowLockScreen” with a value of zero) has now been applied. The next time you lock your PC, the lock screen won’t appear; instead you’ll just see the login screen. When you sign into your PC to unlock it, Windows will undo the registry tweak, but then the task will run (remember the “On workstation unlock” trigger?) and set it right back.

I’m going to try adding this tweak to PTFB Pro’s workstation unlock service component; if successful, the next release of PTFB will render the above lock screen task unnecessary. For right now however, the above process is an effective and elegant workaround.


PTFB Pro Version 5 Adds Visual Triggers and Command Line Control

PTFB Pro has just received a major update and its brought a lot of new features that our customers have been asking for, including:

1) Visual Triggers

Your macros can now fire automatically when a change is seen in a portion of the target window or the screen. It’s a huge new addition for PTFB, allowing it to react to things that we as humans can readily see (such as changes to text, graphics and color) but which previously it was unable to detect. This new trigger can be fine-tuned in a number of ways, so you can have your macros fire exactly when you need them to.

2) Greatly improved command line control for better integration with Powershell and other script shells

Ever since version 3 it’s been possible to trigger macros via the command line, but version 5 has expanded on this considerably. From the command line you can now:

  • Enable/Disable PTFB Pro as a whole, enable/disable a list of macros
  • Trigger any number of macros AND pass named parameters through to be used by v5’s newly extended macro actions
  • Properly synchronise command line actions thanks to the new /WAIT command line directive

3) Control the clipboard

A new “Set Clipboard” macro action has been added which lets you load literal text, the contents of text files, and even files themselves into the Windows clipboard, for use in subsequent paste operations. This action can take a command line parameter, so you can pass in clipboard content from a script or command shell such as Powershell.

4) Track when a macro was last used, and easily archive little-used macros

I’m not afraid to admit that I have mild hoarding tendencies; when I create a macro or single press for a specific job I rarely delete it. The result is that over time my copies of PTFB Pro have filled up with lots of items that were used heavily for a short time, but have layed dormant ever since. PTFB Pro dutifully loads them into memory and checks them multiple times each second to see if they’re ready to fire automatically; remove them, and PTFB Pro becomes just a little leaner and faster to respond. Version 5 now tracks the most recent usage date/time, and can use this information to disable unused items and/or move them to a specific tab.

5) Instantly test your settings on the “Identifying the Target” page

There can be a learning curve for people who are tailoring a single-press or window-based macro so that it keeps firing even when the target window changes. Version 5 takes the guesswork out of this process by adding a “View Matches” button to the target identification page; press that button, and PTFB Pro will show you exactly which windows match your settings.


I’ll take a closer look at these new features in later posts, but you can try them out yourself right now by getting your copy of v5 from our download page: http://www.ptfbpro.com/download.shtml

Note that because this is a major upgrade it’s only free to people who bought v4 on or after June 1st 2016 (about 90 days prior to the release of v5). Anyone who bought before this date can purchase an upgrade license at a 50% discount. Please visit our upgrades page for more details or just send an email to support@ptfbpro.com and we’ll send you a free license / discount purchase link  – whichever is appropriate.

FileZilla Update Notifications

FileZilla is a truly great piece of software. I’ve been using it for all my FTP transfers for years now and it’s never let me down; in fact, over time it’s got faster and more dependable. BUT.. I can’t help but be irritated by its update notification dialog:

FileZilla

To be fair you can configure how frequently FileZilla checks for updates, but thing is, once it finds an update, it’ll bug you relentlessly every time you launch the program until you relent and upgrade. Many times I’m in a rush and I just want to get my file transfer done; I’d rather leave the update for a time when I’m in less of a hurry. There’s no option for that in FileZilla, but with PTFB Pro, I was able to make one using a Single Press Item:

FZ-Press#1

The Single Press quickly dismisses the notification via its Close button..

FZ-Press#2

But as it does this, it takes a screenshot of the notification and mails it to me…

This basically converts the update dialog into an update email; the dialog disappears so fast it doesn’t interrupt my workflow, while the email sits there in my inbox (with a screenshot detailing what the update provides) as a reminder for when I have the time to actually apply the update.

This is one small example of how PTFB Pro can help lessen the irritations of working on a computer, and goes right back to what the acronym PTFB stands for: Push The Freakin’ Button! Grab a copy of PTFB from the download page now – you get a free trial for 30 days, and unlike most software these days, it’s installer is very lightweight (no huge package of runtime libraries or other bloat).


Holding off Standby / Sleep / Display Power-Saving

I was recently asked if PTFB Pro could be used to prevent a computer going into standby mode. Now obviously there’s already a way to do that in Windows; just head over to the control panel and edit the power-saving options. But what if you don’t want to mess with the way the computer is setup, but just want to hold off standby for one specific task, or a specific period of time? Well it turns out that PTFB Pro can indeed help in this situation, and here’s how:

  1. Record a screen-based macro that simply wiggles the mouse a bit (changes mouse position a few times)
  2. Edit the macro to turn off “Skip redundant mouse movement. This is critical, as otherwise the the skip option would suppress the “wiggle”!
  3. Set the playback speed around normal (about halfway position on the slider)
  4. Set the macro to repeat just often enough to hold off the standby. For example, if standby is set to trigger after 30 minutes of inactivity, set the macro to repeat say every 28 minutes.

And that’ll do it. The simulated mouse movement of the macro is enough to tell Windows that the computer is still in use, and it had better not shutdown. The same trick also works for holding off screensavers, display power saving and so on. What’s more, you can use PTFB Pro’s triggering options to finely control when and how long the macro runs for. You could for example:

  • Have it run daily, weekly, or monthly via the built in scheduler
  • Limit the hours it can run between, so that it only runs during work hours, or during a certain portion of the evening
  • Use the command line trigger to tie to the Windows Scheduler or other software for even more options
  • Tie it to another macro so that it only runs when a certain window is present, or a certain other program / process is running


False positives!

As a couple of customers have noted, a recent release of virus definitions for Symantec’s antivirus offerings has generated a false positive for version 4.5.2 of PTFB Pro’s installation package. We’ve reported this to Symantec and they’ve replied, say that they’ll be including a fix in their next release of virus definitions. In the meantime, we’ve put up a new release of PTFB Pro, v4.5.4.0.

The only difference between this release and 4.5.2 is that it has a newer version of the installer engine we use. This change is apparently enough to avoid the false positive from the faulty virus definitions, but if you’re already running 4.5.2 there’s no need to upgrade.

So to sum up: the original 4.5.2 release is virus free, as Symantec’s virus definition update will soon confirm, but if you prefer not to wait for that you can grab v4.5.4.0 from our site which gets a clean bill of health even with the faulty virus definitions.

For more details about false positives please check out at this wiki article: http://en.wikipedia.org/wiki/Antivirus_software, specifically the section titled “Problems caused by false positives”. It contains a potted history of some of the costlier mistakes by anti-virus products thus far.

How to automate external editing in Adobe Lightroom

Neither Lightroom 2 nor version 3 directly support the use of plug-ins and filters in the way that Photoshop does. They do however support the use of “external” editor programs, and this has given plug-in providers a way to get their products working with Lightroom. Take Topaz Labs for example – they have an impressive range of plug-ins, including the almost miraculous “Denoise”, all of which  can be hooked up to Lightroom using a special “go-between” program they call tlfusionexpress. While this is all good news, the actual editing process is clunky, and it’s largely LR’s fault.

First you must hook the external editing program up to Lightroom via the External editing tab in the Preferences screen. This is a one-off operation so that’s OK, but thereafter every single time you start an edit via Photo -> Edit In, you get the following screen:

Lightroom external edit prompt

There’s no way to save your preferences and bypass this screen in future. That’s OK if you’re only using the external editor for the odd photo, but if you’re wanting to use it on a batch of 30 for example, it quickly becomes annoying. That’s not the end of it though, because there’s likely another screen coming up asking you which plug-in you want to use. Here’s the Topaz Labs version:

Topaz choose plugin

You have to do this every single time you edit a photo, and again there’s no way to indicate an automatic preference.

Lightroom is all about speeding up the post processing workflow, but these interruptions really slow you down and break your train of thought. The good news is that prompts like these are exactly what PTFB Pro was originally created for though, and it’s easy to eliminate them from the external editing process.

To deal with the first screen, pull up PTFB Pro’s main window, hit New macro and choose “New Window Macro”. Click on the Lightroom prompt to begin recording, and do exactly what you’d do in a normal edit session, i.e. choose the editing option you want and press “Edit”. At this point macro recording stops automatically and the macro is created and ready for use. You’ll never have to deal with that screen again.

Now we’re on to the next screen,  from Topaz Labs in our example. Again create a new Window Macro in PTFB Pro, choose the plug-in you want and hit “Run”. Now you’re never going to have to deal with that prompt again either.

If you want editing to proceed at maximum speed, you can edit the two macros you’ve just created and set their initial delays down to zero. On most PCs, the handling of the above two prompts will now happen so fast you’ll barely see them.

It doesn’t stop there though! You can go further with PTFB Pro if you want. For example, you could create one big macro that automatically initiates an external edit, deals with the above two prompts, and carries out the actual editing tasks you need. Tie it to a hotkey of your choosing, and you’ve collapsed a substantial amount of waiting, reading and clicking into a couple of short keystrokes.

Alternatively, you could build a macro that runs through a given number of repetitive editing tasks automatically without you even having to be at your computer. When I had a batch of over 40 photos that needed the Topaz Denoise treatment to look their best, I spent a couple of minutes creating a macro to apply the plug-in then advance to the next photo, and set it to run the required number of times. I then took the dogs for a relaxing walk, and when I came back the job was done!

Find out more about automating your workflow with Macros.
CLICK HERE to download a free 30 day trial, no strings attached. If you aren’t entirely happy simply uninstall!