Neither Lightroom 2 nor version 3 directly support the use of plug-ins and filters in the way that Photoshop does. They do however support the use of “external” editor programs, and this has given plug-in providers a way to get their products working with Lightroom. Take Topaz Labs for example – they have an impressive range of plug-ins, including the almost miraculous “Denoise”, all of which can be hooked up to Lightroom using a special “go-between” program they call tlfusionexpress. While this is all good news, the actual editing process is clunky, and it’s largely LR’s fault.
First you must hook the external editing program up to Lightroom via the External editing tab in the Preferences screen. This is a one-off operation so that’s OK, but thereafter every single time you start an edit via Photo -> Edit In, you get the following screen:
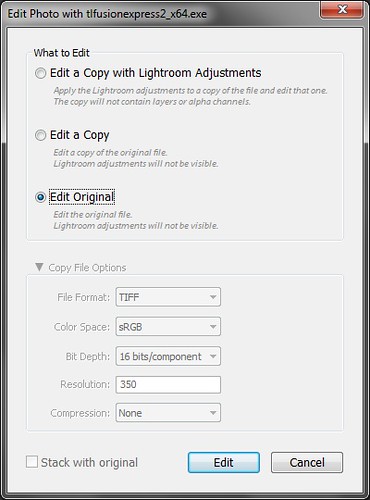
There’s no way to save your preferences and bypass this screen in future. That’s OK if you’re only using the external editor for the odd photo, but if you’re wanting to use it on a batch of 30 for example, it quickly becomes annoying. That’s not the end of it though, because there’s likely another screen coming up asking you which plug-in you want to use. Here’s the Topaz Labs version:
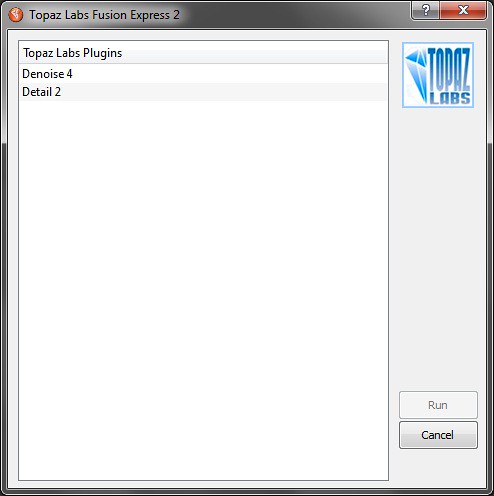
You have to do this every single time you edit a photo, and again there’s no way to indicate an automatic preference.
Lightroom is all about speeding up the post processing workflow, but these interruptions really slow you down and break your train of thought. The good news is that prompts like these are exactly what PTFB Pro was originally created for though, and it’s easy to eliminate them from the external editing process.
To deal with the first screen, pull up PTFB Pro’s main window, hit New macro and choose “New Window Macro”. Click on the Lightroom prompt to begin recording, and do exactly what you’d do in a normal edit session, i.e. choose the editing option you want and press “Edit”. At this point macro recording stops automatically and the macro is created and ready for use. You’ll never have to deal with that screen again.
Now we’re on to the next screen, from Topaz Labs in our example. Again create a new Window Macro in PTFB Pro, choose the plug-in you want and hit “Run”. Now you’re never going to have to deal with that prompt again either.
If you want editing to proceed at maximum speed, you can edit the two macros you’ve just created and set their initial delays down to zero. On most PCs, the handling of the above two prompts will now happen so fast you’ll barely see them.
It doesn’t stop there though! You can go further with PTFB Pro if you want. For example, you could create one big macro that automatically initiates an external edit, deals with the above two prompts, and carries out the actual editing tasks you need. Tie it to a hotkey of your choosing, and you’ve collapsed a substantial amount of waiting, reading and clicking into a couple of short keystrokes.
Alternatively, you could build a macro that runs through a given number of repetitive editing tasks automatically without you even having to be at your computer. When I had a batch of over 40 photos that needed the Topaz Denoise treatment to look their best, I spent a couple of minutes creating a macro to apply the plug-in then advance to the next photo, and set it to run the required number of times. I then took the dogs for a relaxing walk, and when I came back the job was done!
Find out more about automating your workflow with Macros.
CLICK HERE to download a free 30 day trial, no strings attached. If you aren’t entirely happy simply uninstall!